


Water damage is one of the most expensive issues a homeowner can face. Often, the culprit is not a burst pipe, but a degraded silicone seal in the bathroom. Over time, the sealant around your shower tray can shrink, crack, or peel, allowing water to seep behind tiles and under floorboards. To prevent structural damage and unsightly black mould, you need to know how to reseal a shower tray correctly.
While it might seem like a job for a plumber, applying fresh silicone is a task you can complete yourself with the right tools and a steady hand. This guide from Rockaya Global provides professional advice to help you achieve a watertight finish that lasts.
Identifying When to Reseal
Silicone sealant does not last forever. In a damp bathroom environment, it is constantly exposed to water, soap scum, and temperature changes (learn How to Deal with Bathroom Condensation in this handy how-to guide). You should regularly inspect your shower enclosure. If you spot gaps, peeling strips, or black mould that scrubbing cannot remove, it is time to reseal a shower tray immediately.
Ignoring these signs can lead to water penetrating the walls or floor. By the time you notice a damp patch on the ceiling below, the damage is already done. Catching the issue early saves time and money.
How to Reseal a Shower Tray
Before you begin, gather high-quality tools. Cheap application guns or low-grade silicone often result in messy application and seals that fail quickly.
- Sanitary Silicone Sealant: Look for a high-modulus, anti-mould sealant (often classified under EN 15651-3 for sanitary use).
- Cartridge Gun: A sturdy gun allows for a smooth, consistent flow.
- Silicone Remover: A gel formula helps break down stubborn old sealant.
- Utility Knife: For cutting away the old bead.
- Rubbing Alcohol or Methylated Spirit: Essential for degreasing the surface.
- Masking Tape: Helps achieve a straight line.
- Sealant Smoothing Tool: Ensures a professional profile (a wet finger can work, but a tool is more precise).
- Paper Towels: For keeping your hands and tools clean.

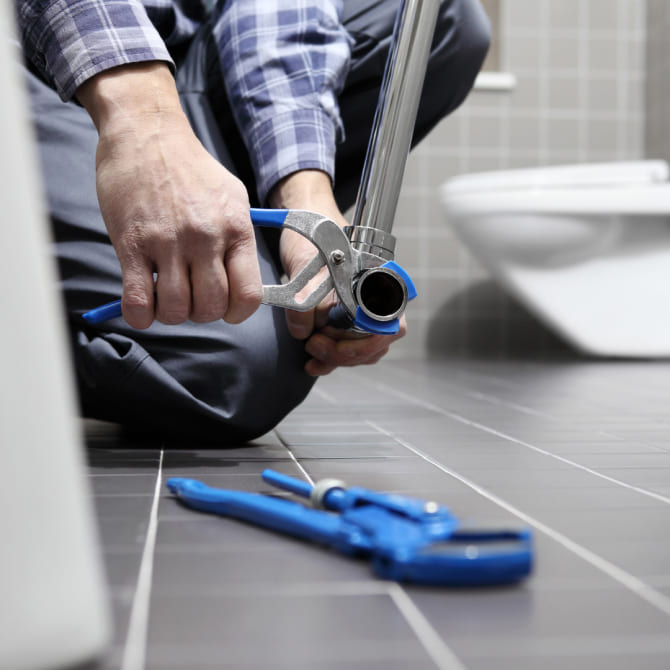
Step 1: Preparation and Removal
The most critical part of the process happens before you open the new tube of silicone. You cannot simply apply new sealant over the old layer; it will not adhere properly and will leak within weeks. To reseal a shower tray effectively, you must start with a completely bare surface.
Start by cutting away the old bead using your utility knife. Be extremely careful not to scratch the tray’s surface or chip your tiles. If the silicone is old and hard, you may need to apply a sealant remover gel. Leave this to work according to the manufacturer’s instructions (usually 2-3 hours) to soften the material.
For a detailed walkthrough on this specific stage, read our guide on How to Remove Bathroom Sealant.
Step 2: Cleaning and Drying
Once the bulk of the silicone is gone, you must remove every trace of residue. Even a thin film of grease or soap will stop the new silicone from bonding.
- Use a plastic scraper to remove any remaining rubber bits.
- Wipe the entire joint area with rubbing alcohol or methylated spirit. This degreases the surface and kills mould spores.
- Dry the area thoroughly. This is non-negotiable. If moisture is present, the new silicone will not cure properly. Use a hairdryer on a low heat setting to ensure the gap between the tray and the tile is bone dry.
Step 3: Application
With a clean, dry canvas, you are ready to apply the new seal. If you are not confident in your ability to keep a straight line, use masking tape on the wall and the tray, leaving a gap of approximately 3-5mm for the silicone.
Cut the nozzle of your sealant tube at a 45-degree angle. The opening should be roughly the same size as the gap you are filling. Load the tube into the gun and test the flow on a piece of cardboard first.
Place the nozzle in the corner of the shower tray. Apply steady pressure to the trigger and move the gun along the joint in one smooth, continuous motion. Do not stop and start, as this creates lumps.
For technique comparisons, you might also find our article on How to Seal a Bath Like a Pro useful, as the principles of steady application remain the same when you reseal a shower tray in your enclosure.
Step 4: Smoothing and Finishing
Once the bead is applied, smooth it to create a slope that sheds water. Use a sealant smoothing tool or a finger dipped in soapy water. Run it along the joint with consistent pressure. This pushes the silicone into the gap to ensure a watertight bond and creates a neat finish.
If you used masking tape, remove it immediately after smoothing while the silicone is still wet. Peel it away at an angle to avoid pulling the sealant bead away from the wall.
Post-Application Tips and Curing
Patience is vital after you reseal a shower tray to ensure durability.
- Curing Time: While silicone may become “touch dry” in 20 to 30 minutes, it takes much longer to cure fully. Most manufacturers recommend waiting at least 24 hours before exposing the seal to water. In colder bathrooms, this can take up to 48 hours.
- Ventilation: Keep the bathroom window open or the extractor fan running to help the curing process and disperse any smell.
- Maintenance: Once cured, clean your shower regularly to prevent mould from returning. Avoid applying harsh bleach directly to the sealant, as this can degrade the sealant over time.
Checking Your Shower Tray
Sometimes, a leak persists even after you reseal a shower tray. If the tray moves or flexes when you stand in it, the seal will eventually break regardless of how well you apply it. A flexing tray suggests an installation issue or a low-quality product.
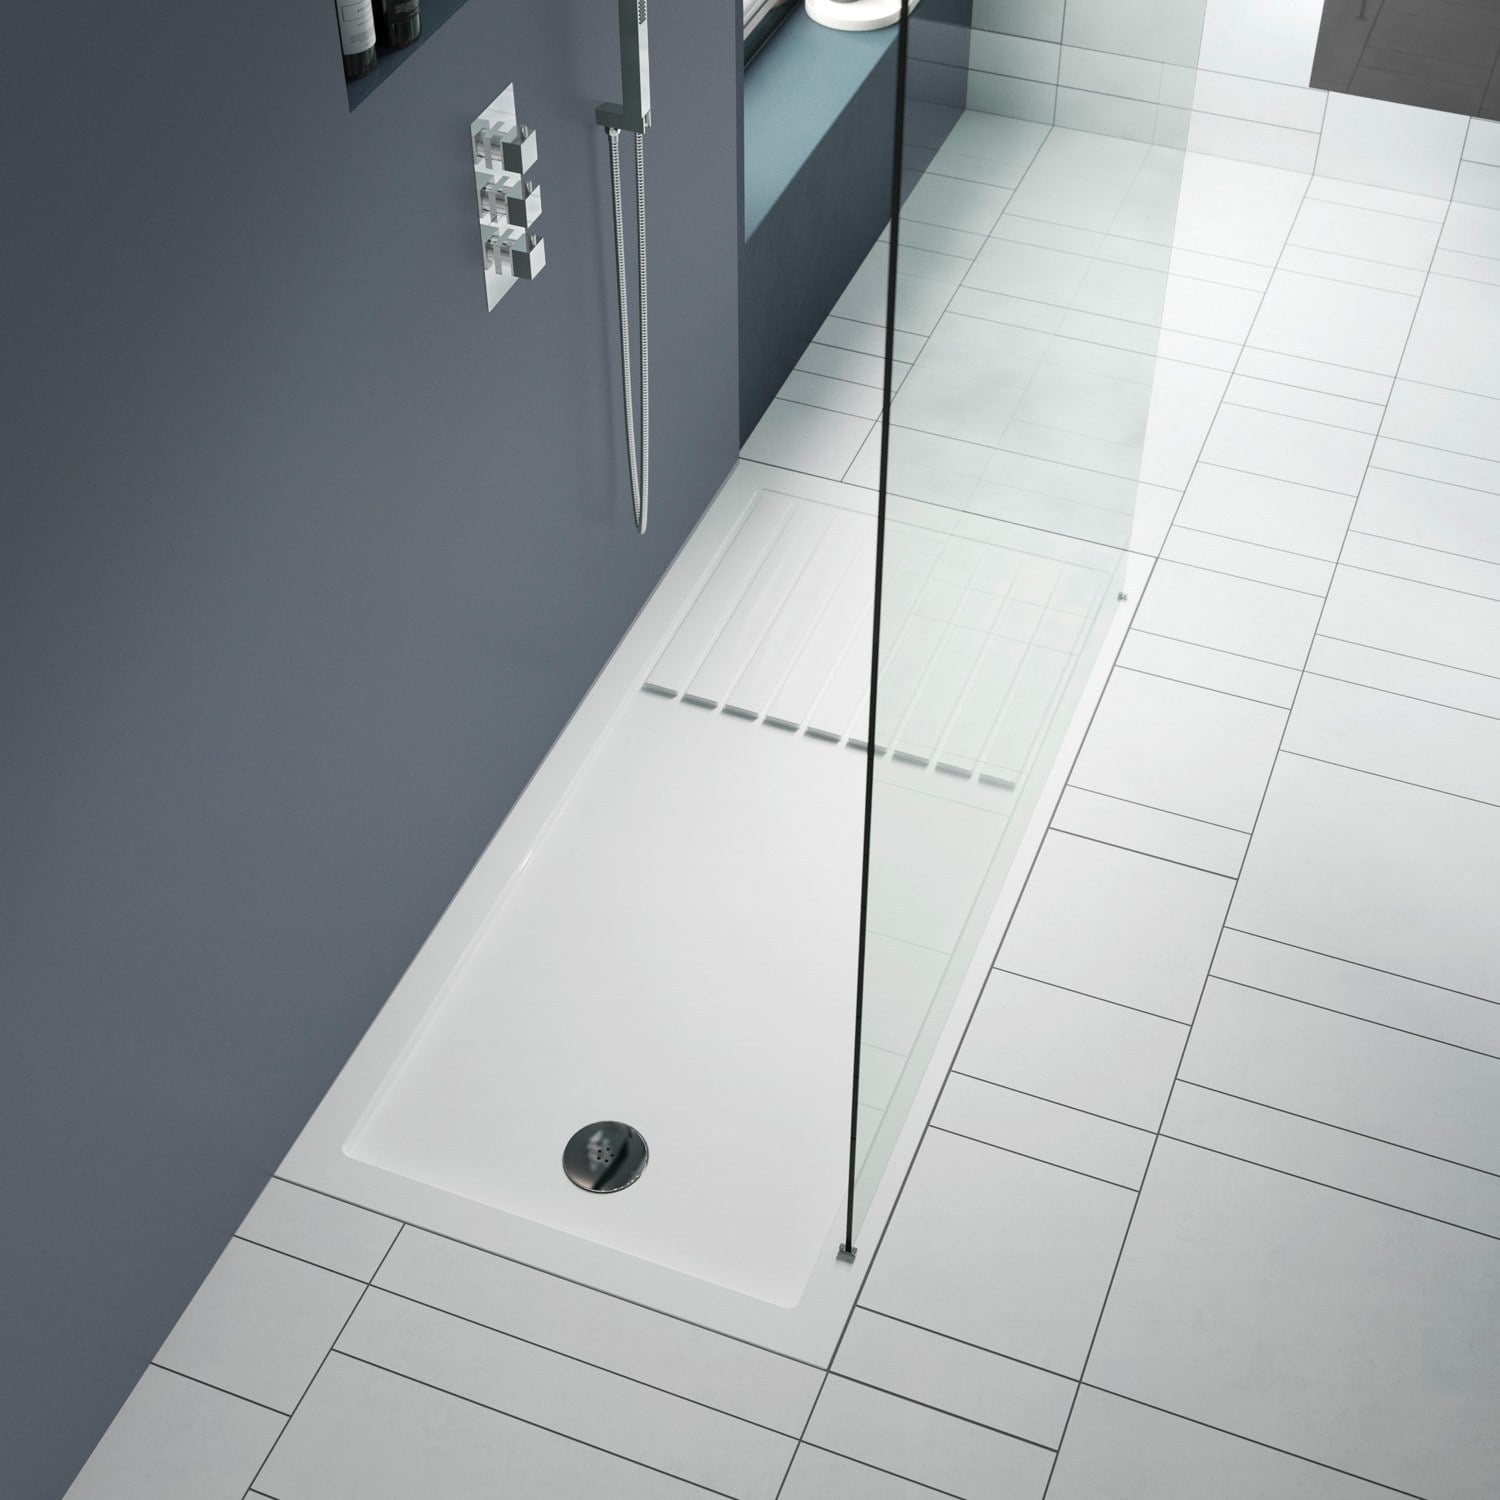
If you need to replace the unit entirely, we recommend a robust, high-quality option like the Kudos Connect2 1400 x 900mm Rectangle Shower Tray. This British-made tray uses a structural resin-bonded stone filler for excellent stability.
Customers have rated it highly for both quality and ease of installation:
“Looks good, feels solid. I can’t comment on fitting as that was down to our installer, but it seemed to go in easy enough.”
“Great product. Fits easily.”
Frequently Asked Questions
What is the best way to seal a shower tray?
The best method involves thorough preparation. You must remove all old silicone and clean the area with a degreasing agent, such as methylated spirit. Apply a high-quality, anti-mould sanitary silicone in a continuous bead, and smooth it down to ensure water runs off into the tray rather than pooling in the corner.
Can you reseal a shower yourself?
Yes, you can. While professional plumbers will do this daily, it is a manageable DIY task. The key is to purchase the right tools (a good cartridge gun and a smoothing tool) and to take the time to clean and dry the surface properly before applying the new product.
How often should you reseal a shower tray?
There is no set rule, but you should typically expect to reseal a shower tray every 1 to 2 years, depending on usage and ventilation. If you notice gaps, peeling, or discolouration before this, replace the seal immediately to prevent water damage.
Conclusion
Waterproofing your bathroom is an essential maintenance task that protects your home from costly damage. By following these steps to prepare, apply, and cure your silicone, you ensure a hygienic and watertight finish.
If you are ready to reseal a shower tray in your home, browse our range of high-quality sealants and tools today. If your current tray is showing signs of age or instability, explore our collection of replacement shower trays for a durable, long-term solution.
Shop Shower Trays now at Rockaya Global.