


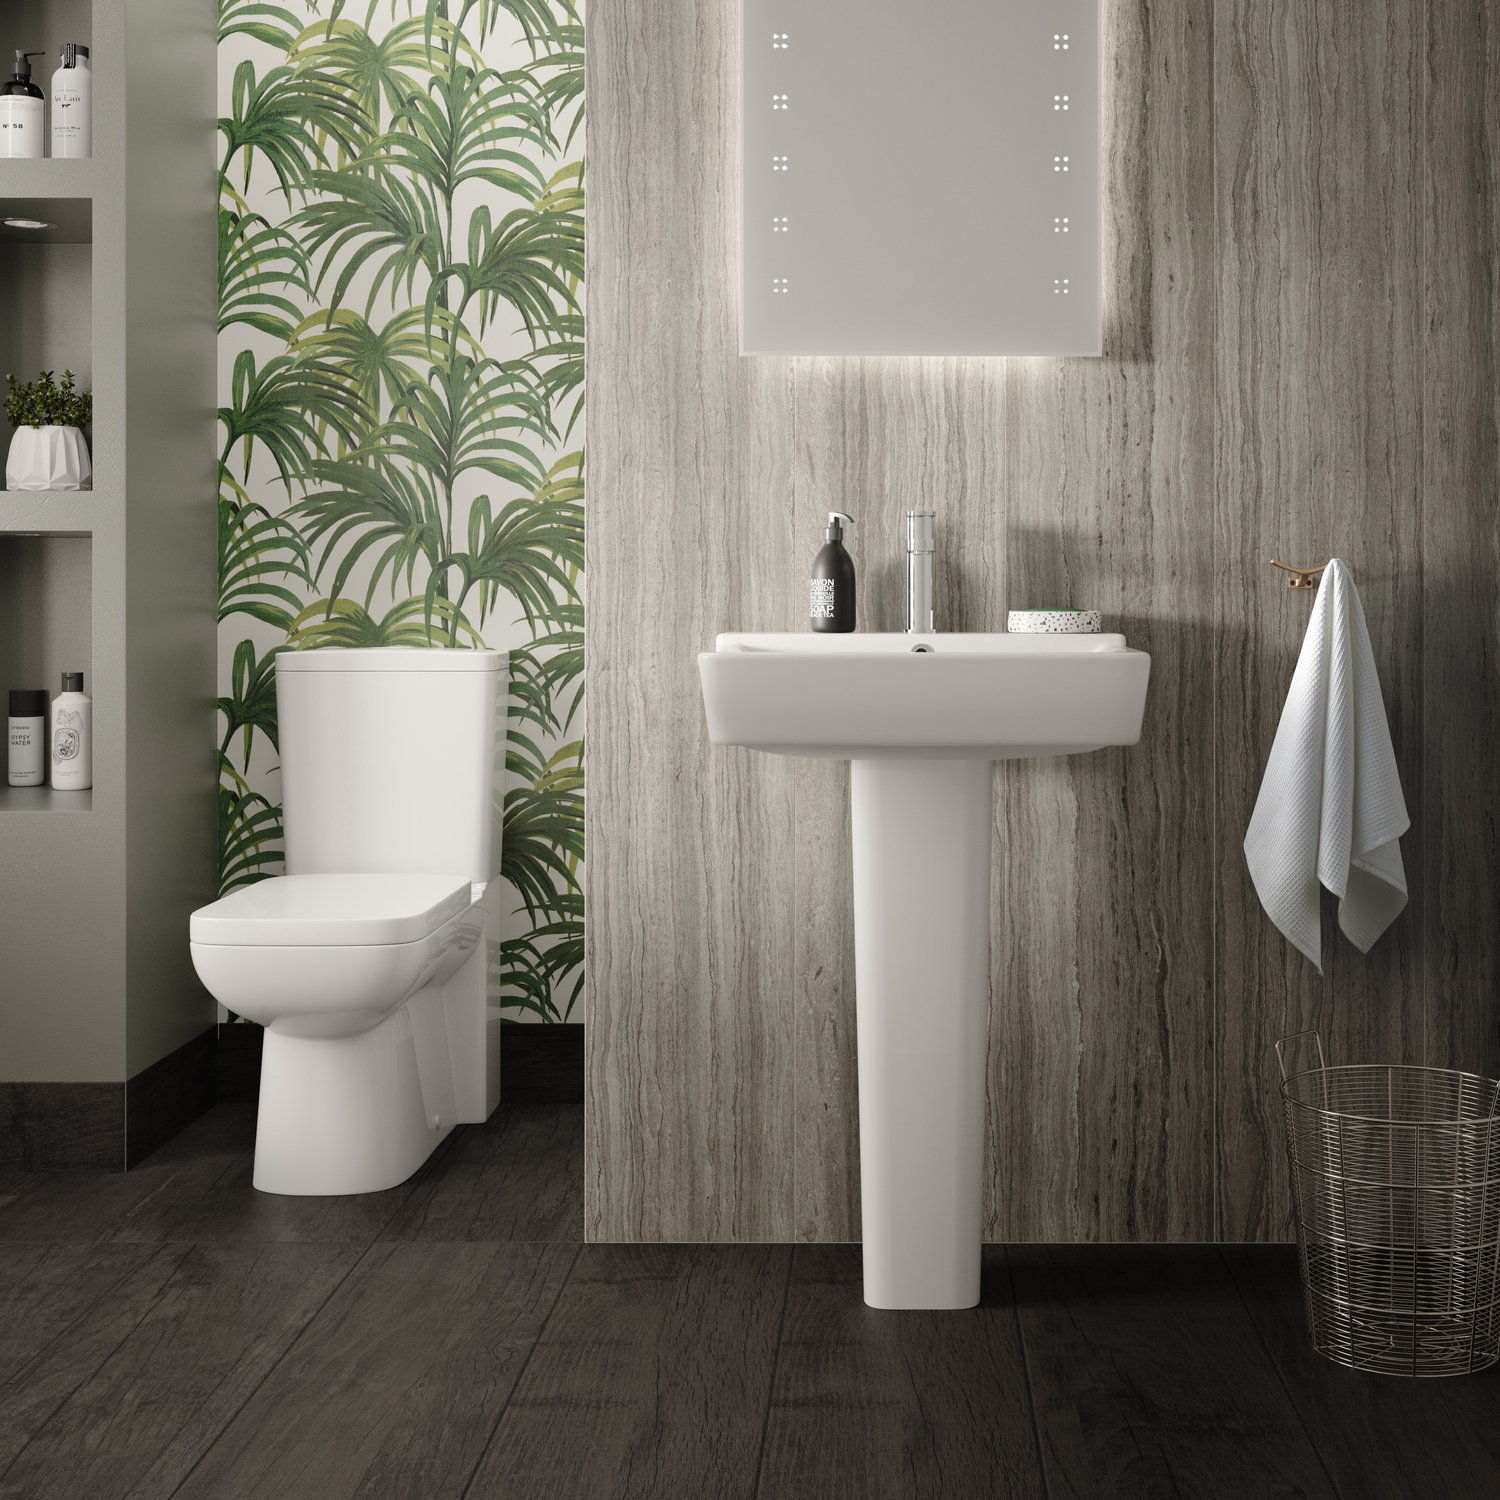
A pedestal basin is a timeless addition to any bathroom design. Providing a clean and elegant finish, this classic setup effectively hides unsightly pipework behind a sleek ceramic column. You get a neat, tidy bathroom that looks brilliant in both modern builds and period-inspired traditional properties.
If you have a solid understanding of basic home maintenance, fitting a pedestal sink yourself is a highly rewarding project. Completing this job without a professional plumber saves money and gives you complete control over your bathroom finish.
This guide from Rockaya Global provides the exact steps you need to fit a basin and pedestal securely. We cover the necessary tools, the proper work sequence, and answers to common questions about bathroom ceramics.
Preparation before starting your installation
Proper preparation ensures a smooth and straightforward fitting process. First, clear the area where you plan to work and remove any packaging from your new basin. Inspect the ceramic surfaces carefully to ensure there are no hairline cracks or transport damage before you begin.
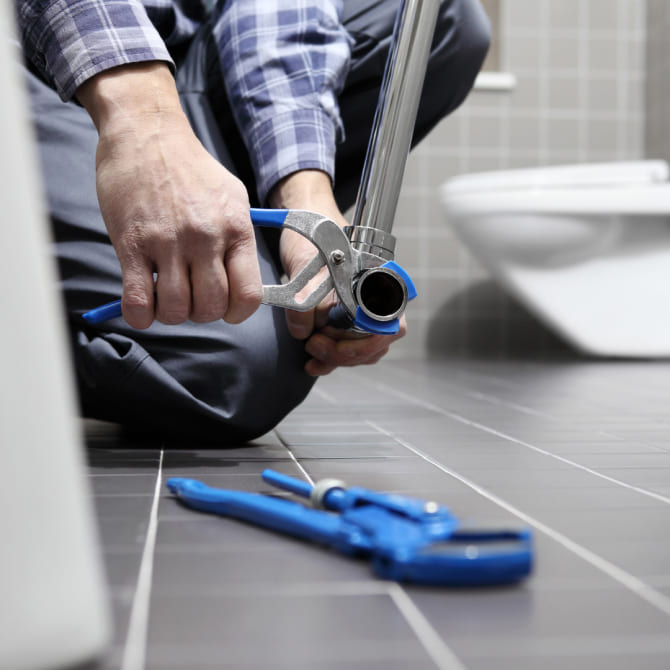
You will need a few essential tools to get the job done properly. Gather an adjustable wrench, a tape measure, a spirit level, an electric drill, a screwdriver set, a pencil, and a sealant gun loaded with high-quality silicone. You also need your chosen basin, matching pedestal, bathroom taps, and a basin waste.
Before touching any plumbing, turn off the mains water supply to your home. This is a critical step to prevent serious water damage. Locate your internal stopcock—often found under the kitchen sink or in an airing cupboard—and turn the valve clockwise. Run a downstairs tap to drain the system and confirm the water has stopped completely.
Step 1: Measure your space and assemble the brassware
Start by measuring the allocated space to ensure your new basin fits comfortably. Once you confirm the dimensions, it is time to fit the brassware. Attaching your basin mixer and waste is significantly easier when the basin is resting safely on the floor, rather than when it is fixed to the wall.
Feed your hot and cold bathroom taps through the designated holes on the basin. Follow the manufacturer’s instructions to secure them tightly with the provided washers and nuts, using your spanner to ensure a firm grip. Next, insert the basin waste. Remember to place the rubber washers between the waste and the ceramic basin to prevent future water leaks.
Step 2: Position the pedestal and mark the wall
Bring the pedestal into position against the wall, then carefully rest the basin on it. Adjust the placement until the basin sits flush against the wall surface.
Place your spirit level across the top edge of the basin. Adjust the positioning until the bubble sits perfectly in the centre, confirming the unit is completely level. Take your pencil and mark the wall through the fixing holes located at the back of the basin. You should also draw a faint outline around the base of the pedestal on the floor to guarantee accurate realignment later. Once everything is clearly marked, move the ceramics safely out of the way.
Step 3: Drill pilot holes and secure the basin
Using your electric drill, carefully drill pilot holes into the wall at the exact locations where you made your pencil marks. Insert heavy-duty rawl plugs into the newly drilled holes. If you are drilling into bathroom tiles, place a small piece of masking tape over the mark before drilling; this stops the drill bit from slipping and scratching the tile surface.
Move the pedestal back into its exact floor outline, and lift the basin back onto it. Align the back of the sink with your wall plugs. Insert the fixing screws through the basin holes and into the wall, tightening them with your screwdriver. Do not overtighten the screws, as excessive pressure can crack the ceramic body.
Step 4: Connect the water supply and waste pipe
With the unit firmly secured to the wall, you can move on to the plumbing connections. Attach your flexible hot- and cold-water lines to the corresponding tap tails. Hand-tighten the nuts first, then give them a final turn with your adjustable wrench to secure the seal.
Next, connect the basin waste to the main waste pipe using an appropriate waste trap. Ensure the seals are seated correctly and tighten the plastic compression nuts firmly.
Step 5: Seal the edges and test for leaks
Applying silicone sealant provides a watertight barrier and gives your installation a professional finish. Run a neat bead of silicone along the back edge of the basin where it meets the wall. Apply another line of silicone around the bottom edge of the pedestal where it meets the floor. Wipe away any excess immediately with a damp cloth to keep the lines crisp and tidy.
Finally, turn your mains water supply back on. Slowly open the new basin taps and let the water run. Check underneath the sink with a torch to inspect the tap tails, the waste trap, and the pipe joints. If you spot any drips, simply turn off the taps and gently tighten the offending connection with your wrench.
Common questions about pedestal basins
Is it hard to install a pedestal sink?
If you have basic DIY skills and the right tools, installing a pedestal sink is relatively simple. The process requires careful measuring, drilling into walls, and basic pipe connections. However, if you are not confident in your ability to secure the unit or manage the plumbing, we highly recommend hiring a qualified plumber to handle the job safely.
Does a pedestal support a basin?
A common misconception is that the pedestal carries the full weight of the sink. In reality, a pedestal only offers secondary support. The wall fixings bear the heavy load of the ceramic basin. The primary purpose of a pedestal is to hide the pipework and trap, creating a neat visual appearance.
Does a bathroom sink need a pedestal?
No, a bathroom sink does not require a pedestal. If you want a different aesthetic or need to save floor space, you can choose a wall-mounted basin. Wall-hung options leave the floor entirely clear, though the bottle trap will be visible underneath. Alternatively, you can install a vanity unit, which provides a dedicated storage space underneath the sink.
Top pedestal basins for your bathroom upgrade
If you are currently planning a bathroom renovation, choosing the right ceramics makes a massive difference to the final look. Explore our extensive Basins with Pedestals category to find the perfect match for your interior design style.
Here are two highly rated options from our impressive collection:
Kartell Proton 540mm 2TH Basin and Pedestal
This modern two-tap hole basin offers a clean, angular design that fits brilliantly into contemporary spaces. Made from durable vitreous china, it provides incredible value. As one of our customers, David P, notes in his 5-star review: “Pleased with the fit, colour and quality for the price”.
Shop the Kartell Proton 540mm 2TH Basin and Pedestal today.
Burlington Victorian 610mm Basin and Standard Pedestal
For a period-inspired bathroom, this traditional basin features delicate, refined edges and a generous washing space. It brings a sophisticated, high-end feel to any home. A recent 5-star review from Lara H highlights its quality: “Nice and solid, has dips at the soap dish parts, taps fit well, easy to keep clean, nice design features, but the angles at the back made it a bit more complex to sort where we put the splash back, eventually lined it up with the widest part, and it looks good.”
Shop the Burlington Victorian 610mm Basin and Standard Pedestal today.
Ajax Waltham 1TH 450mm Basin and Full Pedestal
If you have a slightly smaller bathroom or a cloakroom, this Ajax model is a brilliant choice. It maintains the classic full pedestal look but with a compact 450mm width, ensuring you do not compromise on floor space.
Enjoy your newly updated bathroom.
Fitting a pedestal basin yourself brings a great sense of achievement. By following these clear steps, taking accurate measurements, and ensuring your water connections are tight, you guarantee a secure and stunning result.
Ready to start your next DIY project? Browse our extensive collection of high-quality bathroom products and order yours today for fast delivery at low discount prices.