


Updating your bathroom is an exciting project, but before you can install a shiny new enclosure, you often face a difficult task: removing the old one. Learning how to remove a shower tray properly is essential to avoid damaging your plumbing, flooring, or walls.
Whether you are dealing with a cracked base or simply modernising your space, this guide will walk you through the process. Rockaya Global will cover the tools you need, the safety steps to take, and the specific techniques for different tray types.
Understanding Your Shower Tray Type: Acrylic vs Stone Resin
Before you start ripping up flooring, you need to know what you are dealing with. The material and installation method of your current tray will dictate how difficult the removal process will be.
Acrylic Trays
These are lightweight and often feel hollow when tapped. They are frequently installed on a riser kit (legs) with a panel covering the front. Removing these is generally easier because you can access the plumbing underneath.
Stone Resin Trays
These are heavy, solid, and durable, such as the Kudos Kstone 45mm Stone Resin Shower Trays. They are typically installed directly onto the floor using a mortar mix or strong adhesive. Knowing how to remove a shower tray of this type involves more effort, as you often have to break the bond between the tray and the concrete or floorboards.
Essential Tools and Safety Equipment for Removal
You cannot perform this job with your bare hands. Gather these items before you begin to ensure a safe and efficient workflow:
- Utility knife: To cut through old silicone sealant.
- Crowbar or Pry Bar: For leveraging the tray off the floor.
- Hammer and Chisel: Essential for chipping away mortar or stubborn tiles.
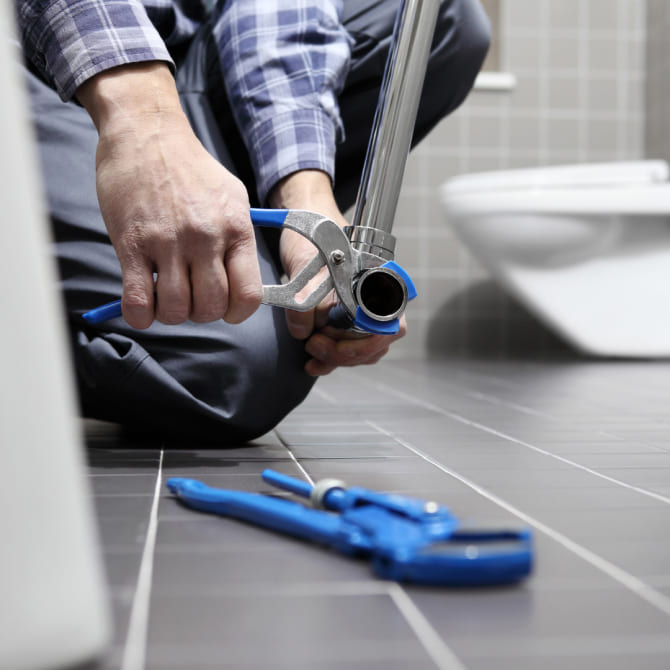
- Adjustable Wrench/Pliers: To disconnect the waste trap.
- Bucket and Towels: To catch excess water from the trap.
- Reciprocating Saw (Optional): Useful for cutting through a stubborn waste pipe.
- PPE (Personal Protective Equipment): Safety goggles and heavy-duty gloves are non-negotiable. Old porcelain or resin can shatter into razor-sharp shards.
Pre-Removal Checklist: Preparation is Key
Don’t rush straight into prying up the tray. A little preparation prevents accidents and flooding.
1. Turn off the water
Locate your isolation valve or stopcock and turn off the water supply to the shower. Even though you are working on the waste (drainage), it is safer to ensure that no water can accidentally flow if a tap is knocked.
2. Remove the shower enclosure
You cannot effectively learn how to remove a shower tray with the glass doors still attached. Unscrew the frame from the wall channels and carefully remove the glass panels. Place them in a safe room away from the work area.
3. Clear the area
Remove any bath mats, toiletries, or loose items. You need space to move, especially if you are hauling out a heavy stone tray.
Step-by-Step Removal Guide
Once the area is prepped, follow these steps to begin the removal.
1. Cutting the Sealant
The tray will be sealed to the wall (and possibly the floor) with silicone. Take your utility knife and run it along the edges where the tray meets the tiles or wall panels. Be thorough here; old silicone can hold surprisingly tight. If you have a bottom row of tiles overlapping the tray, you may need to chisel these off to free the tray edges.
For future reference, read through our guide on How to Reseal a Shower Tray.
2. Disconnecting the Waste
This is often the trickiest part of figuring out how to remove a shower tray.
- Raised Trays: Remove the front panel. You should see the waste trap and pipework. Unscrew the trap from the waste outlet.
- Flat-to-Floor Trays: If you cannot access underneath, you may need to unscrew the waste grid from the top. If the waste is corroded or stuck, you might have to break the tray around the waste hole to free it later.
3. Protect the Floor
Lay down a dust sheet or cardboard. When you pry up the tray, debris and old mortar will likely crumble out.
Lifting Techniques for Different Installations
Now comes the physical part. The method changes depending on how the tray was fixed.
Removing a Tray on Riser Legs
If you have disconnected the waste and cut the sealant, this should be straightforward. Unscrew the feet from the floor (if they are screwed down). If they are glued, use your pry bar to gently lever the legs up. The tray should lift out relatively easily.
Removing a Tray from Mortar
This requires more force. Insert your crowbar under the lip of the tray. Gently apply pressure to lever it upwards.
- Warning: Stone resin trays often crack during this process. This is normal. If you are not reusing the tray, it does not matter if it breaks.
- Use a block of wood under your crowbar to protect the floorboards or tiles you want to keep.
- Work your way around the perimeter, loosening the adhesive bond gradually.
Assessing the Subfloor
Once the tray is out, you will likely be left with a patch of floor that looks less than perfect. Before installing a new one, you must inspect the area.
Check for water damage or rot. If the old silicone failed, water might have seeped into the floorboards or joists. Replace any soft or rotting wood immediately. If you install a new tray over a rotten floor, you risk future movement and leaks.
Ensure the floor is level. Use a spirit level to check the surface. If it is uneven, you may need to lay marine plywood or use a self-levelling compound. A flat surface is critical for the longevity of your next tray.
Next Steps: Choosing Your Replacement
Now that the hard work is done, you can select a replacement that suits your bathroom. Modern trays offer better durability and smarter designs than older models.
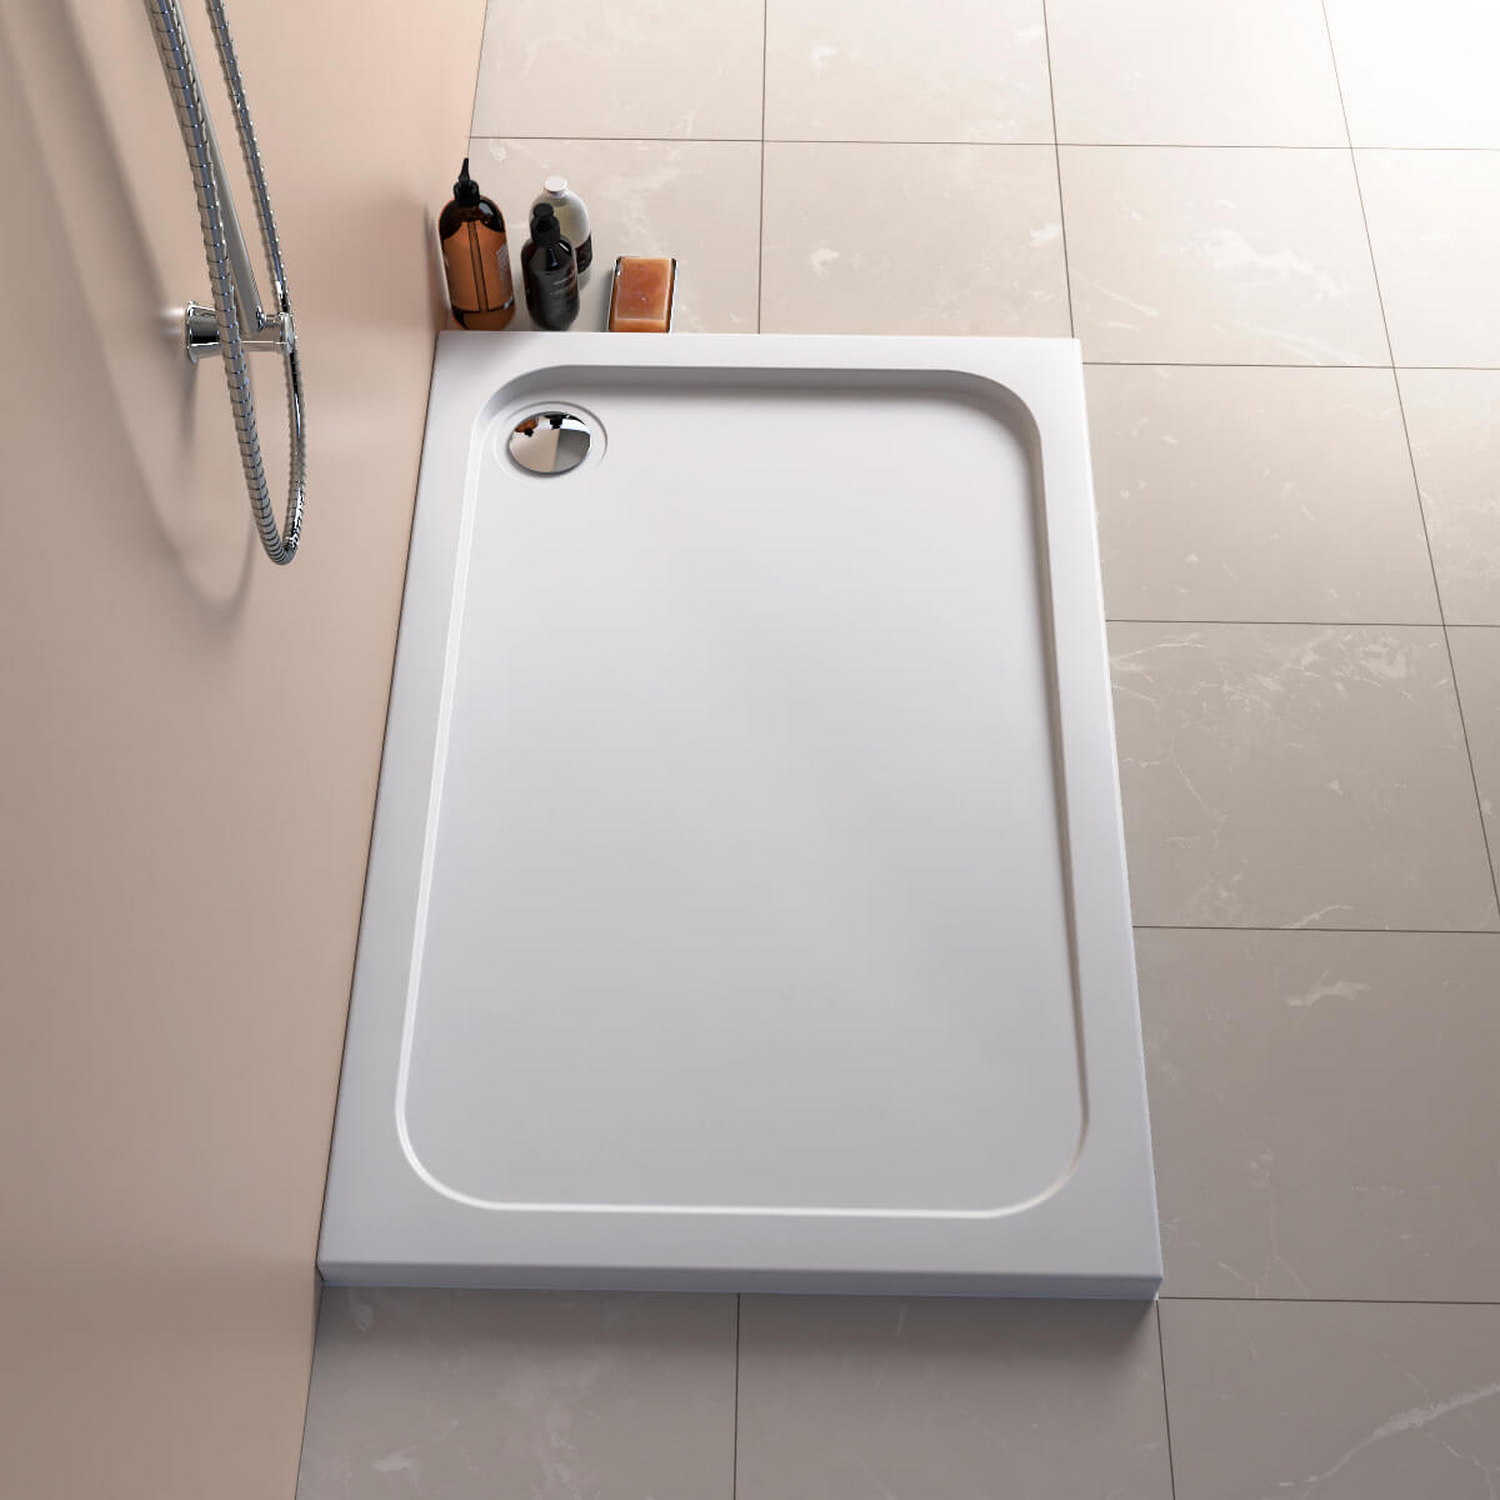
For a Lightweight Solution
If you found the heavy lifting difficult, consider a modern polymer stone resin tray. The MX Durastone 1100 x 900mm Rectangular Low Profile Shower Tray is an excellent choice. It is robust but significantly lighter than traditional stone, as one customer noted: “Very light and easy to handle. Flat base made for easy fitting with onto ply base. So far so good!”
For Safety and Durability
If your priority is safety, particularly for family bathrooms, slip resistance is key. The Kudos Kstone Slip Resistant 1200 x 800mm Rectangular Shower Tray with Corner Waste offers a structured resin-bonded stone filler for stability. It is a popular choice, with one happy buyer saying, “third time purchasing the kudos try from ‘showers to you’ great service throughout and great tray”. Another customer commented on the delivery process: “The tray was fine…”, highlighting the importance of checking your order contents upon arrival.
For Flexible Installation
Sometimes, joists get in the way of the waste pipe. The Kudos Connect2 1400 x 900mm Rectangle Shower Tray solves this with a unique offset waste system. A user mentioned: “Looks good, feels solid. I can’t comment on fitting as that was down to our installer but seemed to go in easy enough.”
Frequently Asked Questions
Is it easy to remove a shower tray?
It depends on the installation. A tray on raised legs is usually easy to remove. A stone tray glued to the floor with strong adhesive can be physically demanding and messy. If you research how to remove a shower tray thoroughly beforehand, you will find the process much smoother.
Are shower trays glued down?
Yes, most low-profile shower trays are bedded down on a weak sand-and-cement mix or a grab adhesive. This prevents the tray from flexing when you stand on it. You will need to break this bond to remove the tray.
How do you remove shower trays without damaging tiles?
This is difficult. If the tiles overlap the tray, you almost always have to remove the bottom row. If the tiles butt up to the tray (rather than overlap), you might get away with just cutting the silicone. However, proceed with caution, as chipping is common.
Can I reuse an old shower tray?
Generally, no. The removal process, especially when applied to stone-resin trays bonded to the floor, often results in chipping or cracking. Even if it looks intact, hairline cracks can cause leaks later. It is safer to install a new one.
When to DIY vs hiring a professional plumber?
If you are confident in your ability to handle waste pipes and heavy lifting, you can do this yourself. However, if you are unsure how to remove a shower tray without damaging the subfloor, or if the waste pipe is inaccessible, hiring a professional plumber gives you peace of mind.
Ready for Your Renovation?
Knowing how to remove a shower tray is the first step toward a beautiful new bathroom. While it requires some effort and the right tools, it is a manageable job for a patient DIYer.
Once your old tray is out and the floor is prepped, you are ready to choose a stylish, high-quality replacement. Browse our extensive range of shower trays today to find the perfect fit for your bathroom.
Contact us today via email at info@rockayaglobal.com, by phone at +1 (571) 581 7190, or through our online contact form.